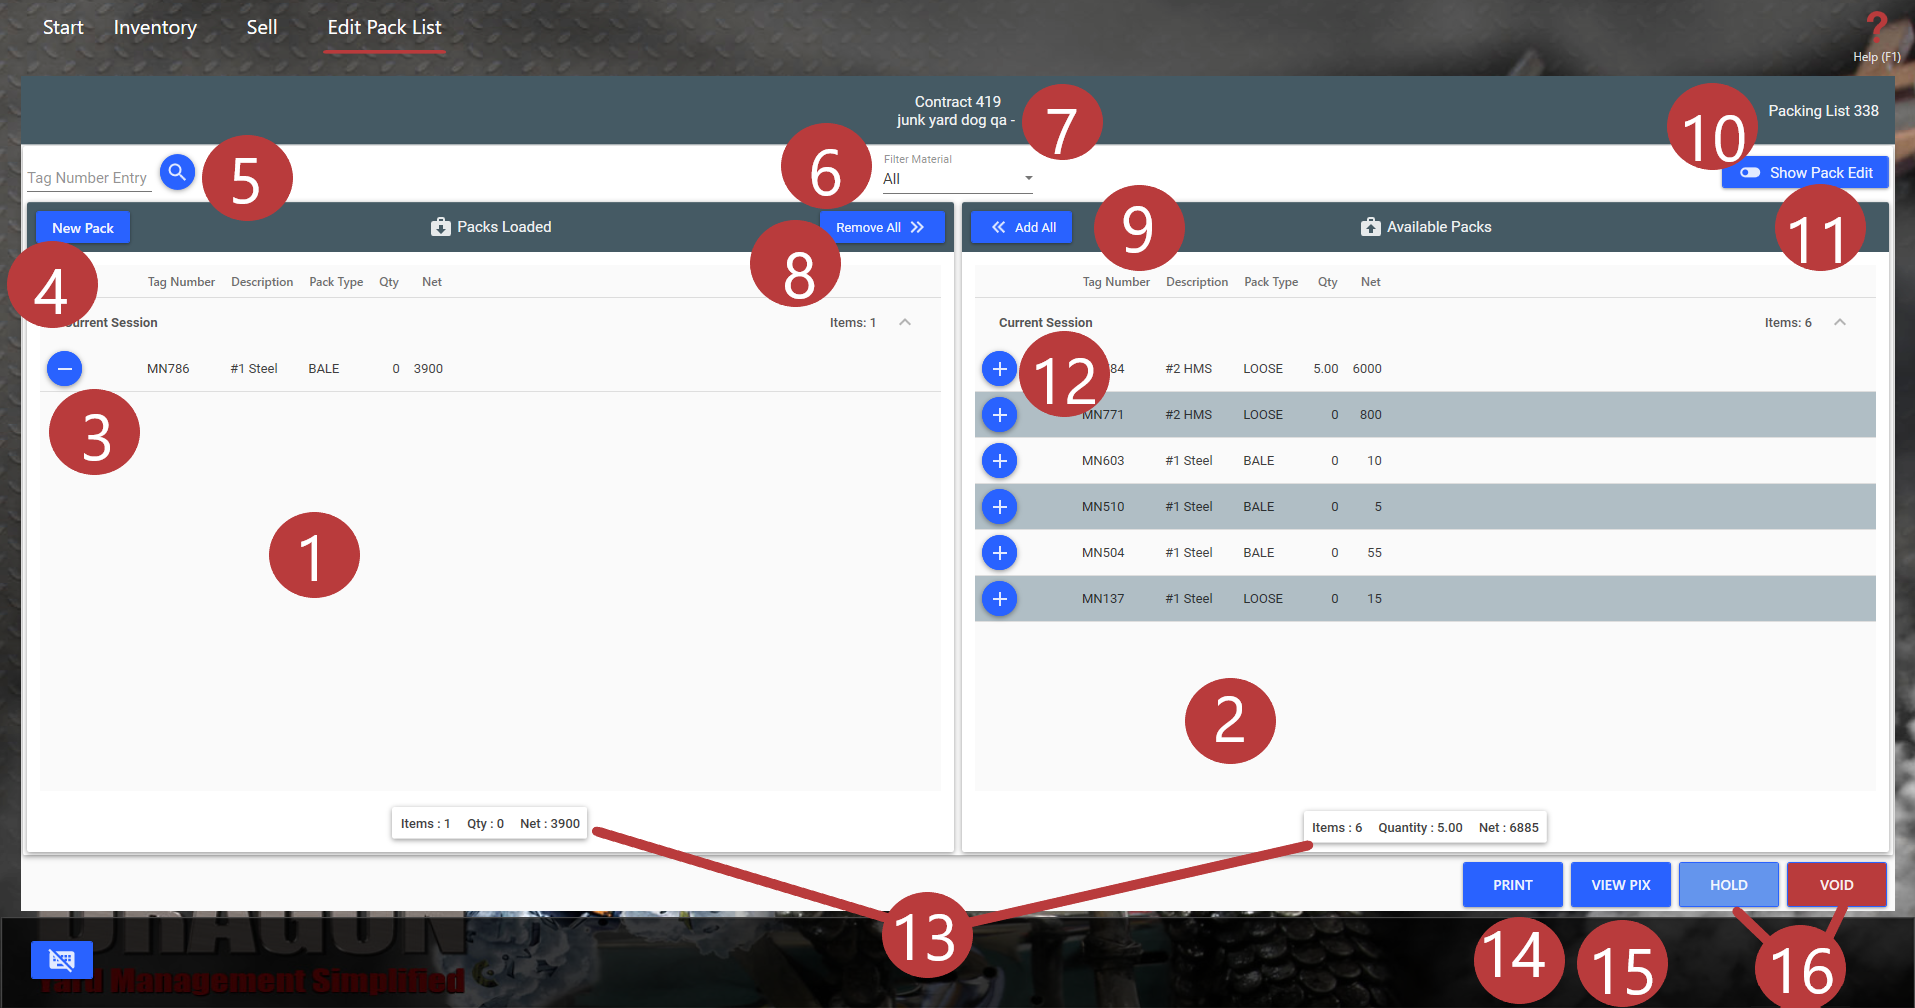

The Packing List screen has a completely new layout in SDX 3.2.1 and later versions that allows for more efficiency and easier management.
| 1 | Packs Loaded Area-This area of the screen will display what packs have been loaded to the current Pack List. | |
| 2 | Available Packs Area-This area of the screen displays packs that are available to be added. | |
| 3 | Remove Icon-This button will appear next to each Loaded Pack. Clicking it will remove the specific pack from the Packs Loaded Area of the screen and move that pack to the Available Packs Area on the right side of the screen. | |
| 4 |
New Pack Button-Clicking this button will allow you to create a new pack to be added to this contract. When clicked, a commodities menu screen will appear where you can input the details for this new pack.
|
|
| 5 | Tag Number Entry-A tag number of an available pack can be entered directly into this field, then, when the |
|
| 6 |
Filter Material-This drop down menu will allow you to filter the materials displayed in both the Packs Loaded and Available Packs screen. Clicking on it will give you the option to choose between the commodities you wish to view or allow you to view all materials without a filter. In the example below, #1 Steel has been selected from this drop down menu. Filtering materials does not remove them from Packs Loaded or Available Packs and simply allows you to view your packs based on commodity.
|
|
| 7 | Contract Information-This area of the screen displays the contract number. | |
| 8 |
Remove All Button-This button will remove all packs from the Packs Loaded Area of the screen. You can use this in conjunction with Filter Material, and remove packs only consisting of the material you filtered for. Simply select the material you wish to filter, then select Remove all, and all packs of the filtered material will be removed and placed in the Available Packs area of the screen, while any packs consisting of materials not filtered for will remain on the Packs Loaded Area of the screen. |
|
| 9 |
Add All Button-This button will add all packs from the Available Packs Area of the Screen to the Packs Loaded Area. This feature can also be used in conjunction with the Filter Material drop down. |
|
| 10 | Packing List Information-The Packing List number is displayed in the top right corner of the screen. | |
| 11 |
Show/Hide Pack Edit Toggle-Toggling this will allow you to edit the packs in both the Packs Loaded and Available Packs section of the screen. When you toggle it on, the
|
|
| 12 | ||
| 13 | Information Field-This area shows you the Net weight, quantity and number of Items on each side of the screen. | |
| 14 | Print-This will print the packing list. | |
| 15 | View Pix-This will bring up all images associated with this Packing List. | |
| 16 | Hold and Void Buttons-These buttons will allow you to Hold the packing list or Void it if you need to. |